ORGANIC DISEASE CONTROL METHODS OF VEGETABLES
Today, we discuss organic disease control methods in vegetable farming . we also cover various common vegetable diseases and how to control these organically.
Diseases occur when environmental conditions are appropriate for pathogens to develop on susceptible plants. Some pathogens attack a wide selection of plants and others attack only specific plants. Also, some pathogens can attack all plant parts, while other attack selected plant parts.
There are mainly five major groups of plant pathogens.
They are mainly fungi, water molds, bacteria, viruses, and nematodes.
Successful disease management begins with an accurate diagnosis or finding the basis of the problem. Knowing the common diseases of individual plants will help to recognize the disease. Many diseases are known based on signs and symptoms.
For the disease to develop, three factors should be present they are a suitable host plant, an infectious pathogen (microorganism that causes the disease), and a suitable environment. Disease control measures aim to decrease or eliminate one of the corners of the disease triangle. Since the three factors (host, pathogen, and environment) interact, it’s very important to consider each one and incorporate a variety of management approaches.
Disease management in organic vegetable production in the WET regions is arguably difficult than in drier regions.
Organic vegetable
farming involves a comprehensive approach to soil maintenance, crop health, and the maintenance of a biologically dynamic and diverse agro-ecosystem.
🏼Many organic farming practices favorably impact vegetable plant health. Examples of these organic farming practices are crop rotation and building soil organic matter, through cover crop amendments and inclusion of compost .
🏼The plant health benefits conferred by organic farming practices can be further enhanced through additional cultural, chemical and biological practices that suppress disease.
What are we waiting for? let us get into the details of organic disease control in your vegetable garden or commercial cultivation!
ORGANISMS THAT CAUSE PLANT DISEASE:
Let us discuss some of the important
organisms that cause plant disease and products for controlling disease;
🏼Fungi
🏼Bacteria
🏼Viruses
🏼Nematodes
FUNGI:
Fungi cause
🏼spots,
🏼lesions, and blights,
🏼yellowing of leaves,
🏼wilts, cankers, rots,
🏼fruiting bodies,
🏼mildews, molds, leaf spots,
🏼root rots, cankers, and blotches.
Fungi are normally spread by wind, rain, soil, mechanical means, and infected plant material.
Fungi, along with bacteria, serve as the planet’s major decomposers by breaking down organic material and many form symbiotic relationships with plants.
However, the parasitic relationship some fungi increase with plants (e.g. rusts, fungal leaf spot, powdery mildew, etc.) can damage the plants and it is very important to have a proper fungicide to minimize those effects.
✍BACTERIA:
Bacteria cause
🏼water-soaking,
🏼spots, wilts, rots,
🏼blights, cankers,
🏼galls, yellowing of leaves,
🏼leaf spots, watery blotches, wilting.
Bacteria are typically spread by rain, planting material, vectors (ex. bacterial wilt of cucurbits spread by cucumber beetle)
Some plant diseases caused by bacteria are not as prevalent as those caused by fungi, but can nonetheless be damaging.
Common plant bacterial diseases consist of bacterial leaf spot, some blights, and citrus greening.
The damage caused by bacterial infection results mainly in the rotting of the plant tissue, however, exhibit symptoms can like gall production, cankers, scabs, and unsuitable crop harvest.
VIRUSES:
Viruses cause
🏼mottling, leaf distortions, and stem distortions,
🏼mosaic patterns, rings, and stunting. Viruses are typically spread by mechanical means, vectors and in plant material.
Viruses in plants are transmitted most often by sucking insects that are aphids, psyllids, and whiteflies.
Infected plants typically become somewhat damaged and weakened; however, some viruses will kill the plant.
NEMATODES:
Nematodes cause
🏼wilting, stunting, yellowing of complete plants. This will occur because the roots of the plant are infected and the plant is starving or thirsty. Nematodes are spread by soil on equipment or workers boots or on infected some plant material.
SOIL BUILDING METHODS TO REDUCE PLANT DISEASE.
The main method to maintain healthy soil is to increase organic matter content; this will improve soil structure and diversify the microbial community. Disease suppression can occur when soil-building tools such as mulches, cover crops, and compost are utilized.
ORGANIC DISEASE PREVENTION AND MANAGEMENT:
✍PREVENTION:
The easiest and most economical way to manage plant disease in the vegetable plants is by maintaining vigorously growing, healthy plants.
🏼Vegetable plants weakened by drought, improper fertility, competition from weeds, and mechanical or insect damage are more susceptible to infection by disease-causing agents. 🏼Prevent disease before it occurs because infected plants are seldom brought back to good, healthy, productive development.
🏼The following basic practices will help prevent plant disease;
CULTURAL PRACTICES:
Some of the cultural practices to prevent plant diseases are;
🏼Avoid over-watering or vegetable planting in poorly drained soils to prevent root diseases and seed decay.
🏼Space vegetable plants for good air circulation and plant in well-drained soil.
🏼The use of raised beds and organic matter as a soil amendment will help on planting sites that are poorly drained.
🏼Use fertilizers and any pesticides as directed. Measure accurately and apply correctly to avoid toxicity to plants.
🏼Use drip irrigation process and avoid overhead watering to prevent foliar diseases. If this cannot be done, water in the morning time so that upper plant parts dry off rapidly or by applying water directly at the plants’ roots and avoiding splashing water up onto the plant leaves.
🏼Normally, do not cultivate or harvest when plants are wet. Be particularly alert for excessive moisture and disease symptoms under row covers and mulches.
🏼Apply mulch around plants to maintain disease spores from splashing from the soil onto foliage.
🏼Monitor vegetable crops regularly for disease symptoms.
✍Some cultural control techniques are given below;
🏼Planting material:
The use of healthy, pathogen-free transplants is very important for avoiding the introduction of a pathogen into a field. A transplant program that minimizes transplant shock and reduces excessive handling and maintenance is of great benefit in maintaining healthy, disease-free plants.
🏼Water and moisture management:
To manage free water and excessive moisture in the vegetable plant canopy, it is necessary to use an efficient irrigation system, which limits the duration of leaf wetness.
🏼Staking and tying plants can help to open up the canopy and keep moisture at a minimum.
🏼 Additionally, growers must manage plant density (i.e., row spacing, limiting nitrogen) to allow for appropriate air circulation and to aid in providing effective chemical coverage when needed.
🏼Environmental monitoring:
To best manage the foliar disease, it is very important to understand weather conditions that impact target pathogen. Several disease forecasting systems for vegetables (which we are yet to establish in africa) use environmental conditions to specify critical periods for disease development.
MANAGEMENT TECHNIQUES OF ORGANIC DISEASE CONTROL:
Disease management or disease control is a key concern in organic vegetable production . Because few curative control methods are obtainable, disease prevention practices are critical for both soil-borne and foliar diseases.
🏼Effective disease management focuses on the integrated use of plant varieties that could resist or tolerate infection from a specific pathogen, combined with the use of cultural, biological, and chemical control strategies that eliminate pathogen inoculums.
🏼Inoculums are used in vegetable plant disease when referring to spores or the infectious parts of the pathogen that can survive or reproduce, furthering disease development.
🏼Foliar diseases generate unique challenges; they are typically not predictable in timing and pressure, their source of origin can vary, and they are often best managed by using resistant varieties and Organic approved fungicides and seed treatments.
BIOLOGICAL CONTROL
The use of biological practices for disease management is on the rise for organic vegetable growers.
Biological materials can be safer than some synthetic chemicals for organic growers and the environment.
Because biological are more stable in the soil environment than on foliage, they are mainly used to manage soil-borne organisms.
Biological control agents have been successful in controlling the disease by inducing vegetable plant resistance, producing antibiotics, and out-competing pathogens.
CHEMICAL CONTROL
While the use of pesticides in organic farming is restricted, some products are acceptable under the National Organic Programs of different countries and could be very effective for vegetable disease management .
🏼Before choosing a chemical substance, however, the organic vegetable producer should exhaust all proactive steps.
🏼Several materials, including hydrogen peroxide, chlorine, and sodium hypochlorite, are available, mainly for sanitation.
🏼Few of the products obtainable for organic disease management are active as curatives. Sulfur products can provide some disease control, particularly for powdery mildew.
🏼However, sulfur can burn sensitive crops under certain conditions only.
🏼Copper is commonly used in several current formulations depending on the particular crop and pathogen.
The effectiveness of coppers varies with the site, and copper usage should be closely monitored.
🏼Over application could lead to copper accumulation in the soil, contamination of run-off water, and subsequent toxicity to non-target organisms. In some geographic areas, copper use has become limited or restricted.
Thursday, July 25, 2019
Wednesday, July 17, 2019
How To Profitably Earn From Growing Irish Potatoes
How To Profitably Earn From Growing Irish Potatoes

Irish potatoes is one of the crops that can easily make one a millionaire-only if they do the right thing. In Uganda, Irish potato growing is increasingly becoming commercial, thanks to the growing demand resulting from the increase in townships, population and hospitality industry.
For farmers looking to venture into the business of growing Irish potatoes, below are the steps that will help you earn big from the crop.
Step 1: Choose Seed Potatoes
Start with organic, certified disease-free seed potatoes obtained from a catalog or farm store. (Supermarket potatoes that have been treated with a sprout-retardant are not suitable for planting).
Start with organic, certified disease-free seed potatoes obtained from a catalog or farm store. (Supermarket potatoes that have been treated with a sprout-retardant are not suitable for planting).
If you buy from a farm store, try to select tubers which have already sprouted. Otherwise, pre-sprout them by simply laying them out on your kitchen counter. Pre-sprouted potatoes can be harvested a few weeks earlier than their non-sprouted kin.
Step 2: Separate the EyesOnly small, golf ball-sized potatoes should be planted whole.
Cut large tubers into pieces so that each segment has two or three “eyes”, the little bumps from which sprouts emerge. The reason for cutting the potatoes is because the many eyes on a large potato will create a crowded, multi-stemmed plant, with each stem competing for food and moisture, and in the end, bearing only small potatoes.
Cut large tubers into pieces so that each segment has two or three “eyes”, the little bumps from which sprouts emerge. The reason for cutting the potatoes is because the many eyes on a large potato will create a crowded, multi-stemmed plant, with each stem competing for food and moisture, and in the end, bearing only small potatoes.
Step 3: Cure the Cut Pieces
Next, “cure” the cut pieces. Either set them out in the sun, or place them on a table or counter in a warm (about 70°F), moderately lit room for three to five days. This step permits the cuts to become calloused. Calloused seed potatoes will help prevent rot.
Next, “cure” the cut pieces. Either set them out in the sun, or place them on a table or counter in a warm (about 70°F), moderately lit room for three to five days. This step permits the cuts to become calloused. Calloused seed potatoes will help prevent rot.
Step 4: Plant Your Potatoes
Plant each potato segment cut-side down (eyes up) in a 6-inch-deep hole or trench. Space each segment 12-inches apart on all sides.
Between each segment, sprinkle 2 tablespoons of a low-nitrogen, high-phosphorous fertilizer. Then cover both potatoes and fertilizer with 2-inches of soil, and water the soil well.
When should you plant potatoes? This will vary depending on where you live. Gardeners in warm climates often plant around Valentine’s Day, while those in cooler areas may get them into the ground near Easter. A good rule of thumb is to aim for 3-4 weeks prior to your last frost date.
Step 5: Hill Around the StemsBecause new potatoes form on lateral stems, or “stolons” above the seed potato, it’s necessary to “hill” the vines. When the green sprouts achieve 8 inches in height, bury all but their top 4 inches with soil, chopped straw, or shredded leaves. Hill again when vines grow another 8 inches. The more you hill, the more prolific your harvest is likely to be. Usually hill yours to achieve a height of 18 inches. Stop hilling when the vines flower.
Potato tubers, like vampires, need to live in darkness. In fact, they will turn green if exposed to light. And a green potato can cause sickness if consumed. Therefore it is absolutely essential to keep the tubers covered with soil or mulch.
Potato tubers, like vampires, need to live in darkness. In fact, they will turn green if exposed to light. And a green potato can cause sickness if consumed. Therefore it is absolutely essential to keep the tubers covered with soil or mulch.
Step 6: Harvest Your Potatoes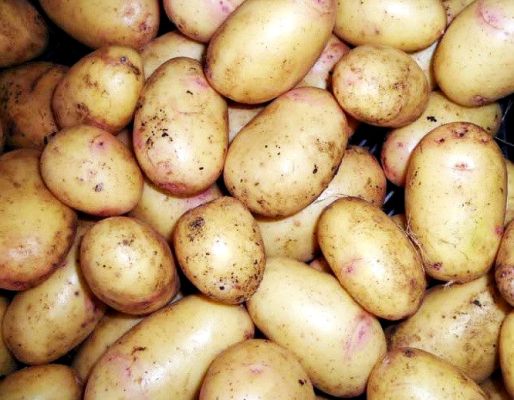
Two weeks after the vines have flowered, you can, if you wish, reach into the soil or mulch and retrieve a few baby potatoes. Otherwise, wait until the vines die back. Dead vines signal that the tubers have reached maturity. Now reach into the soil with your hands and pull the tubers up.
How long do potatoes take to grow? Small new potatoes can be ready as early as ten weeks. However, full sized potatoes take about 80-100 days to reach maturity.
Step 7: Store Your Potatoes
Since your potatoes are grown for storage, leave them in the ground until cool weather arrives. Why? Because potatoes will only store well if they are placed somewhere cold, but not freezing. The closet in your mudroom doesn’t cool off until the outside temperatures plunges to 45° at night. So harvest time for you is usually a sunny day in late October.
After digging the tubers, let them sit on top of the raised beds for a few hours to dry, as illustrated. This brief drying-period toughens their skin, and prepares them for storage. Then gently brush off any loose soil from the tubers, and place them in double thicknesses of paper bags.
Preventing Potato Blight
The dreaded fungal disease known as the “potato blight” (Phytophthora infestans) was responsible for the Irish potato famine and can destroy your entire crop, too. To reduce the chance of infection, never plant potatoes (or tomatoes and other members of the nightshade family, such as eggplants or chili peppers) in the same patch of land without leaving an interval of at least three years. Also, promptly remove any volunteer potatoes that emerge in your garden. The disease overwinters in tubers left behind during the previous year’s harvest.
The dreaded fungal disease known as the “potato blight” (Phytophthora infestans) was responsible for the Irish potato famine and can destroy your entire crop, too. To reduce the chance of infection, never plant potatoes (or tomatoes and other members of the nightshade family, such as eggplants or chili peppers) in the same patch of land without leaving an interval of at least three years. Also, promptly remove any volunteer potatoes that emerge in your garden. The disease overwinters in tubers left behind during the previous year’s harvest.
Wednesday, June 12, 2019
A complete guide to Cocoa farming in Uganda
How to grow COCOA in Uganda
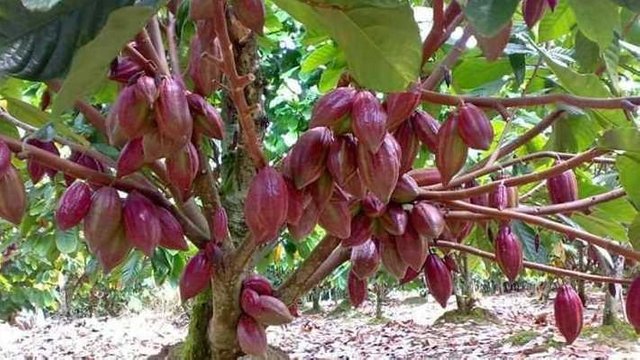
All chocolate begins with cocoa beans, the fruit of a perennial cocoa tree.
Scientist say the tree originated somewhere in south or Central America.
Some say the first trees grew in the Amazon basin of Brazil while others place its origin in the Orinoco valley of Venezuela.
Wherever it’s first home, we know the cocoa tree is strictly a tropical plant thriving only in hot, rainy climates.
This places Africa as a main home for cocoa growth.
Cocoa can only be cultivated within 20 degrees north and south of the equator.
Common Cocoa varieties in Africa
There are two main species of cocoa, criollo and forastero.
Criollo is sometimes called the price of cocoas as it’s a very high quality grade of cocoa with exceptional flavor and aroma.
A third type of cocoa is Trinitario hybrid or across between the main species.
How to Propagate Cocoa in Uganda
Cocoa is propagated both by seed and by cuttings.
Seeds are planted at stake where 3 seeds are planted per hole and later thinned to one.
Germination often is complete within 15 days of seed planting.
Alternatively cuttings can be obtained from young vigorous healthy trees in the mother garden.
These should be cut at a right angle usually above anode 5-12 inch along with 3-9 leaves.
Remove the bottom leaves and dip the base in a rooting hormone.
How to Plant Cocoa
Traditionally cocoa grows under a shade, such as natural shades provided by other trees.
So in preparation of the land for planting you should pick land which will protect the cocoa from direct sun light and winds.
The size of the hole should be at least 2ft X 2ft
The size of the hole should be at least 2ft X 2ft
 |
| The hole must be slightly bigger than this. And the soil must be separated. The dark soil on one side the red soils on the other side. Always use the dark soil to refill the hole first during planting |
Transplant of the seedlings when steady rains set in before the dry season.
A spacing of 3mx3m should be used which gives a plantation of 1000 trees per hectare.
REPLACING MISSING SEEDLINGS
Sometimes certain cocoa seedlings do not grow well. They remain small or die.
During the months following the day when you planted your seedlings, you must always look to see whether the cocoa trees are growing well.
If you see diseased or dead cocoa trees, pull them out and burn them, and also those encircling them in case of swollen shoot disease . In their place, plant other young cocoa seedlings, from among those that you have kept in the nursery bed or in baskets.
If you see diseased or dead cocoa trees, pull them out and burn them, and also those encircling them in case of swollen shoot disease . In their place, plant other young cocoa seedlings, from among those that you have kept in the nursery bed or in baskets.
Crops that can be intercropped with Cocoa
When cocoa has just been planted, it provides enough space that make it convenient for other crops to grown as well. Cocoa like any other tree plant, requires a lot of nitrogen for vegetative growth. It is therefore advisable that intercropping cocoa with legumes is a well thought idea. The legumes are known to be excellent nitrogen fixers which makes cocoa growth and establishment vigorous.
On a commercial basis and profitability, it is commercially wise to intercrop the plant with banana for the following reasons.
Remember, our primary goal for intercropping cocoa is ti increase profitability. Nothing more
- The fact that bananas start producing in not more than a year, they will be in position to provide food to the farmer and if sold to the markets, they provide capital which can be used to manage the cocoa plants through be able to pay for laborers, buy fertilizers and manure where necessary . By this, the farmer does not feel the burden of rising the funds to look after the plantation from other sources
 |
| Young cocoa trees intercropped with mature banana plants. Such a practice is good more especially if cocoa is your primary target crop and your using bananas as shade crops |
- The bananas provide shade to cocoa as it grows. Cocoa like coffee, highly need shade especially when still young and during the maturity period when they have started fruiting. If not provided with shade during those stages, the chances of reaching economic loss if high. It is therefore advisable that you intercrop your cocoa field with some bananas to provide shade.
Apart from legumes and banana, you can do what we can enterprise mix, where legumes, banana and cocoa can be on the same piece of land but you have to be mindful of the spacing for the banana as this time, it increases from 3M to 6M. This increases the intensity of light received by the legumes and also provides a better atmosphere in your field.
 |
| Cocoa plants intercropped with coffee and bananas |
The same enterprise mix can be done where you can decide to mix cocoa, banana and coffee. However, when you do this mix, you need to determine which of the three ( cocoa, banana and coffee) do you take as your primary enterprise. If for example it is cocoa for this matter, the the spacing for the other two has to be double to provide enough growing space to the cocoa plant.
Remember, cocoa, banana and coffee need the same spacing (10ftX10ft) and this translates to 450 plants of each in an acre and about 1000 in an hectare. But the fact that we primarily want cocoa as our major crop, then we have to increase the spacing for the other two to 20ft x 20ft. This means we shall half the amount of each ( 225). Coation has to be taken not to make your plantation a mess by over populating these three crops in the name of enterprise mix.
Do not worry about this, if you fill you have not understood it where, please contact us, we will be able to guide you

How to Weed Cocoa in Uganda
Weeding cocoa field is as easy as weeding any other plant. However, the tools to be used during cocoa weeding are highly determined by the level of maturity of your cocoa field
- For young field that are not more one year, our ordinary hand hoes can be used. Because at this time, the root network is not well established and pronounced. But even then, avoid digging around the plant to avoid damaging the cocoa roots.
- For a mature plantation, use of hand hoes must be totally avoided. At this level, we all know the roots have fully established and if they are damaged in any way, then plant growth will be retarded and this affects the yield and most particularly the pod size reduce.
- Weed 3 to 4 times a year. This should be done by ring weeding around the cocoa trees and slashing along the rows of the cocoa trees. This should be done using forked hoes to avoid damaging the roots
Application of manure and fertilizers
Cocoa like any other coffee and bananas is a heavy feeder crop. This literally mean that it requires a lot of nutrient.Application of nutrients depending on the stage and level of growth of the cocoa plant. This is so because the rate of nutrient requirement depends on the stage of the plant growth. And the only way to do this is through addition of nutrients through manure and fertilizer application. The major nutrients elements required are Phosphorus during planting - for root establishment. This is obtained by addition of organic manure during planting at a ratio of 1:2. And in case of inadequate manure, fertilizers can also provide the necessary nutrient. Let us look at it in this angle
- During planting, the cocoa plant needs a lot of phosphorus (P) and this can be obtained through use of organic manure as we saw earlier on. At this stage, we are only looking at how best the cocoa plant will establish quickly given the dynamics in the growth conditions. The application of manure therefore provides the necessary nutrients need for crop establishment. Organic manure is believed to the only form of nutrient source that provide almost all the required growth elements to plants.The only limiting factor is that it is hard to get enough for the entire plantation. This is where farmers are advised to complement the application through the inorganic fertilizers. However, caution must be taken on what to buy at what stage. We shall have a detailed analysis of fertilizer usage and rates at a later date but let us get the basics for this case. Since we need a lot of P during crop establishment, you are therefore advised to buy fertilizer specific for this this element ( a phosphate fertilizer for this matter). They are many of them in the market like DAP, MOP, SSP, TSP and others but since we saw that cocoa is among the heavy feeder crops, this means that every nutrient must be provided in abundance and in this, TSP is believed to have a lot of P compared to the other (Tri Super phosphate). So during planting, apply at least a palmful of TSP to each cocoa plant. This should be mixed in the used which is replaced back into the hole during filling. Using NPK is also advisable but the percentage of P must be higher than the other two ( at least 46%P) or NPK flat
- When the plant has established, it now needs a lot of Nitrogen to encourage the attraction of more sun light and also be able to make its food.Just make a ring around the plant of about 1ft and apply the nitrogen fertilizer. CAN, urea or any other nitrogen fertilizer can be used at a rate of 250g
- The same can be done to the potassium fertilizer. This must be applied when our cocoa plant is just a few months to fruiting. K is a good element that encourages and enhances fruiting among the growing crops like cocoa.
- Please note that the rates of application of these nutrient elements increases as the plants grows. In shorts, the rates used to feed a young cocoa plant are not the same when the cocoa plants reach one or more years. The rates increase with increasing maturity of the the cocoa plant.
 |
| Ring fertilizer application |
Pruning of the cocoa plant
The cocoa tree is a tree that develops well.
It has a single, straight trunk.
A crown of 3 to 5 main branches forms about 1.5 metres above ground level.
Sometimes, during the first year, several shoots form on the trunk.
Cut off these shoots and leave only the strongest.
Sometimes the crown forms too low down, at less than 1 metre above ground level.
Choose a shoot which grows straight up and let it develop.
A new crown will then form at a good height, and the first crown will stop growing.
Cut off these shoots and leave only the strongest.
Sometimes the crown forms too low down, at less than 1 metre above ground level.
Choose a shoot which grows straight up and let it develop.
A new crown will then form at a good height, and the first crown will stop growing.
| Young well-grown cocoa tree |  |
 |  |
| Young cocoa tree with two shoots | Cocoa tree which forms its crown too low down |
Always cut out all dead branches, dry twigs and suckers.
A sucker is a twig that grows upward out of the trunk.
Cut off the suckers very close to the trunk.
Cut off the suckers very close to the trunk.

When a cocoa tree gets old, it no longer yields many pods.
But you can make cocoa trees young again by letting one or two suckers grow low down on the trunk where they can develop their own roots.
Then cut down the old trunk, and you will again have a cocoa tree that yields many pods.
But you can make cocoa trees young again by letting one or two suckers grow low down on the trunk where they can develop their own roots.
Then cut down the old trunk, and you will again have a cocoa tree that yields many pods.

Pests and diseases that affect the cocoa plant
There are various diseases and pests that attack the cocoa plant and these are listed below:
Cocoa swollen shoot
This is caused by a virus and it leads to the swelling of the shoots and leaves. It leads to defoliation of the leaves causes stem swelling and the growth of nodes on the shoots of the leaves.
It can prevented and managed by separating the cocoa plants with a 33 feet distance and the affected area should be cut off to prevent further spread of the disease to other parts.
The cocoa pod borer
This affects the cocoa by the insect larvae entering into the pods before they mature. These make it extremely difficult to separate the beans from the pods and it can be prevented by placing the pods in plastic bags to prevent the insects from laying their lava on the immature pods.
The witch’s broom
It is caused by fungi and its symptoms include branches that do not produce fruit, discolored leaves and pods which have uneven ripening and green patches.
The infected area should be cut off and discarded whereas the cocoa should be planted in a clean environment as this will reduce on the spread of disease.
The frosty pod disease
This is caused by fungi and it causes the cocoa to have spots on the pods which are brown in color and it should be noted that they mostly affect growing pods.
The application of copper and cutting down the affected area can prevent the spread of the diseases and if possible, the cocoa should be planted in the dry season.
Challenges faced in cocoa growing
The climatic change in Uganda is a bit of challenge to the farmers in the country. This can cause immature growth of the cocoa pods leading to losses on the farm.
There is also a problem of pests and diseases that attack the cocoa causing poor yields during harvesting period.
Most of the farmers are not aware of the market for cocoa and they end up selling the cocoa for less than what it is supposed to be sold for making loses in the process.
Cocoa has an increase in demand and this has become a problem because the cocoa produced does not meet the required demand.
Benefits of growing cocoa in Uganda
-
It provides employment opportunities to the people through labor and the farmer also earns big from the cocoa.
-
Cocoa helps health wise in controlling heart attacks in people.
-
Cocoa husks can b used as manure for gardens which improves the fertility of the soils.
-
Cocoa is also a form of food in form of chocolates which are eaten by everyone after processing it.
With the ever changing world and market all around, we all need to move with the changing world and cocoa is becoming a fast trending crop in the country. Therefore for those that want to earn a bit more and gain from the crop both through imports and exports, try growing cocoa and you will not regret it.
How to Harvest Cocoa
It provides employment opportunities to the people through labor and the farmer also earns big from the cocoa.
Cocoa helps health wise in controlling heart attacks in people.
Cocoa husks can b used as manure for gardens which improves the fertility of the soils.
Cocoa is also a form of food in form of chocolates which are eaten by everyone after processing it.
Harvesting Cocoa involves removing ripe pods from the tree, and opening them to extract the wet beans.
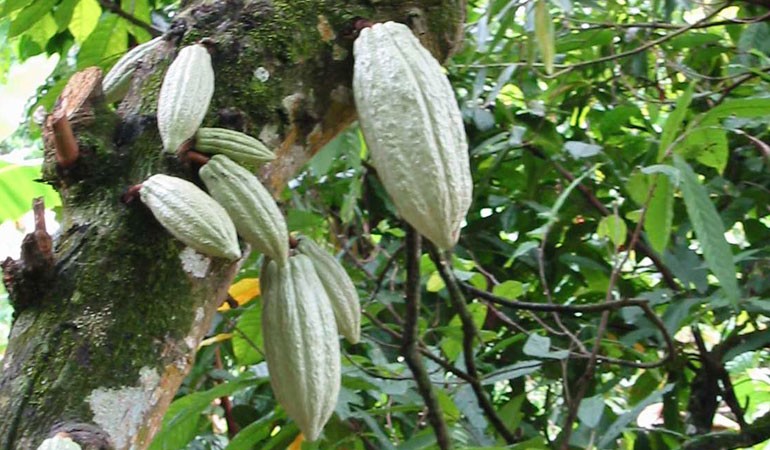
Ripe pods assume a distinctive color and seeds rattle inside, green pods turn yellow and red pods turn orange.
Make a clean cut through the stalk with a well sharpened blade to remove the cocoa seeds.

PROCESSING COCOA BEANS
Opening the pods.
Do not wait more than 4 days to open the pods.
Open the pods by hitting them with a thick piece of wood.
Take the beans out of the pods and put them in baskets.
Then carry them to the place where they are to ferment.
Do not leave the broken husks on the field.
They can be used to make compost.
Why cocoa beans are fermented.
 |
| Longitudinal section of a cocoa plant |
We have seen that the cocoa bean consists of a seed coat, a kernel and a germ.
Cocoa beans are fermented so as to destroy the seed coat, kill the germ and give the cocoa a good taste.
Cocoa beans are fermented so as to destroy the seed coat, kill the germ and give the cocoa a good taste.
 |
| Good fermentation box |
Often cocoa growers ferment the beans in heaps. They chose a flat and dry spot, cover it with banana leaves, make a heap of cocoa beans and cover the heap with banana leaves.
The beans ferment well if the heap is stirred from time to time.
It is much better to ferment the beans in boxes.
Use boxes with holes in the bottom.
Place these boxes on supports, for instance stones.
The juice runs off at the bottom of the boxes through the holes.
After two days, take the beans out of the box, stir them around well and put them into another box.
To make this work easier, you can stack the boxes one on top of the other.
Never leave the beans in the same box for more than two days.
Fermentation takes 6 to 10 days.
The beans are purple at the beginning, and turn reddish when they are fermented.
Drying cocoa beans
When the beans are well fermented, they must be dried.
Cocoa beans may be dried in the sun.
Spread the beans on boards raised 1 metre above ground level.
The layer of beans should not be very thick; not more than 4 centimetres.
Stir the beans often and protect them from rain.
To protect from rain, you can make a little shelter and slide the boards under the shelter every night and when it rains:
This is called a sliding tray drier.
Drying cocoa beans takes five to ten days.
In forest regions where the climate is very moist, cocoa beans do not dry at all well.
Badly dried beans are of poor quality.
You get less money for them.
In such regions several growers can get together and build a modern drier.
Spread the beans on a concrete slab set well above floor level.
Light a fire underneath, or allow hot air to pass through drums to heat the concrete slab.
Then the cocoa beans will dry better.
In this way one man alone can take care of drying the harvest of several growers.
He should not let the fire get too hot, to prevent the beans from becoming smoky.
He should stir them often so that they do not burn.
When the cocoa is quite dry, the beans are sorted.
- Remove all the:
- flat beans
- germinated beans
- mouldy beans
- broken beans.
- Keep only good beans.
- Put these good beans into sacks.
- Keep the sacks in a dry place well protected against animals.
- Finally sell your sacks of cocoa.
- well harvested,
- well fermented,
- well dried.

Sliding tray drier

Quick Tips for growing cocoa in Africa
- Open up hole in arrow with a spacing of 3mx3m
- Harden off seedlings meant for planting, by gradually increasing light and reducing humidity. This takes 28days.
- Transfer the hardened off seedlings into the field, ensure to remove the polythen leaving the seedling with a ball of earth
- Put it in a hole and cover firmly with top soil first then subsoil.
- Water thinly and mulch to conserve the soil moisture. However a small space of 5-6cm around the seedlings base should be left clear to allow air circulation.
- Weed the plants basing on the intensity of the weeds
- Prune the tree leaving only one main stem to facilitate formation of a cone canopy.
- Apply sufficient fertilizers where necessary
- Harvest the pods when they ripen off
Tuesday, June 11, 2019
Makerere Private & District Quota Admission Lists 2019/2020 Is Out. Find it here

Makerere Private & District Quota Admission Lists 2019/202

The Main Administration Building, Makerere University, Kampala Uganda as seen from the Freedom Square.
The Office of Academic Registrar, Makerere University has released lists applicants admitted under the Private Direct Entry Scheme, Bachelor of Laws Private Day and Evening Programmes, District Quota under Government Sponsorship as well as Ugandan Students with foreign qualifications admitted on Private Admission for the Academic Year 2019/2020.
Also released are the Cut-Off Points for Private Students' Admissions for the Academic Year 2019/2020
NB: Candidates recommended for admission on District Quota under Government Sponsorship are pending verification by their respective districts.
Please see Downloads for detailed lists.
DOWNLOADS & ESSENTIAL ATTACHMENTS
Subscribe to:
Comments (Atom)


Popular Posts
-
Are you planning to start a vanilla growing business in Uganda or you're Vanilla importer, Cosmetics Manufacture, Ice cream Maker, Cho...
-
 Why pig breeds matter in the market Commercial piggery requires keeping pigs with known history of performance in daily weight gain, fe...
 -
How to grow COCOA in Uganda All chocolate begins with cocoa beans, the fruit of a perennial cocoa tree. Scientist say the tre...

